

Shopware 6 - Create a cart and an order using the Storefront REST API
In part one and two of our series on how to use the Shopware Storefront REST API, we learned how to register a customer and everything around the reset password functionality.
This blog post will explain how to
- create a shopping cart
- add products to the cart
- increase or decrease the quantity of a product
- and create an order from the shopping cart.
- We will also learn how to delete an item and the whole cart.
A Postman collection containing all of the requests that we will be using in this tutorial can be found >>here<<.
- Login a user, create a cart with a product and checkout the cart
- Login a user
- Create a cart
- Add a product to the cart
- Check on your cart in the frontend and the database
- Delete a line item from the cart
- Decrease the quantity of the product
- Checkout the cart - create an order
- Delete the cart
- Order Overview
- Having a cart and not logged in?
On our “Shopping Cart and Checkout Journey” we will cover two cases.
- The user logs in and creates a cart.
- The user creates a cart and adds products to it. Then he logs in to his account. In his account, he already had products in his cart.
The second workflow is much more complex, but it reflects real user behavior and therefore needs to be addressed.
So let’s start with the first case.
Login a user, create a cart with a product and checkout the cart
We will login the user, create a shopping cart, add a product to the shopping cart, increase the quantity of the product, and check out the shopping cart, i.e. create an order from the shopping cart.
Login a user
Login your user by calling the POST/account/login endpoint, using the username and password as the request body.
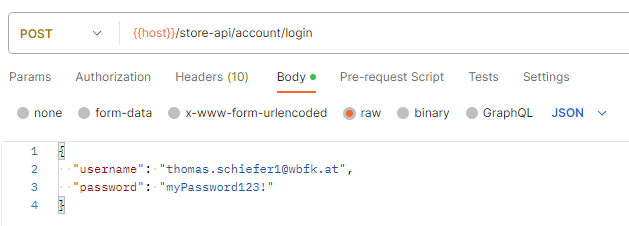
The request response is the sw-context-token, which you need to remember.

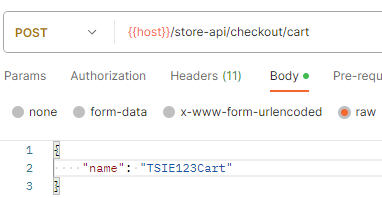
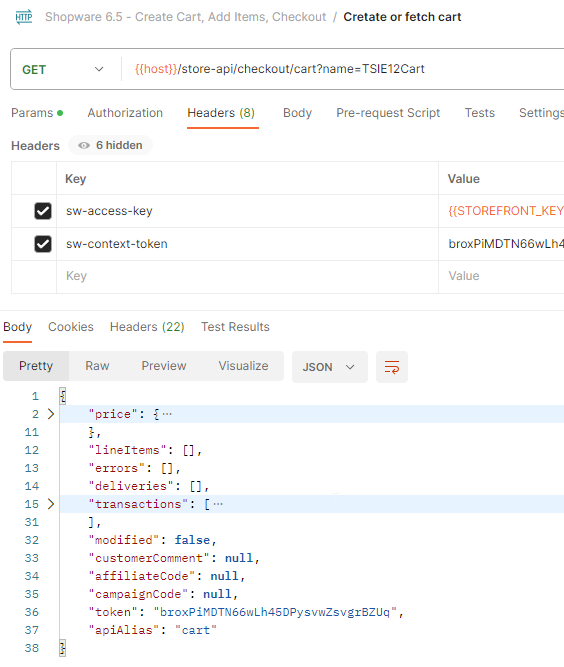
Create a cart
Create a shopping cart by calling the GET/checkout/cart or POST/checkout/cart endpoint. Both endpoints provide the same functionality. If you want to give the cart a name, you can do so by passing a URL parameter to the GET call.

In the POST call, you would pass the name as a JSON body.
The response of both endpoints is either an empty cart if the logged-in user has no products in the cart yet:

Or the response is an object containing line items:
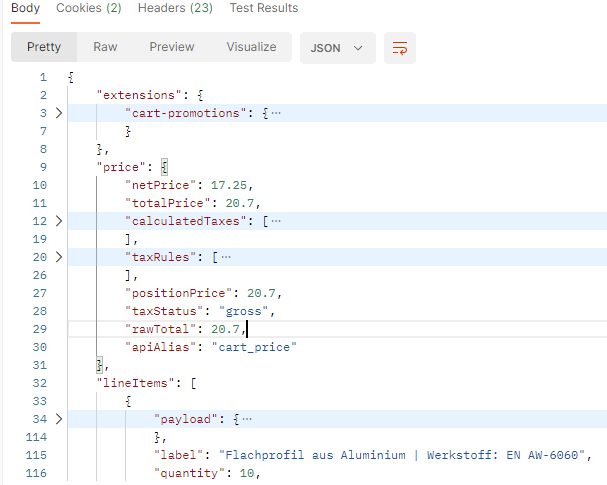
For our next step, let’s assume we start with an empty cart.
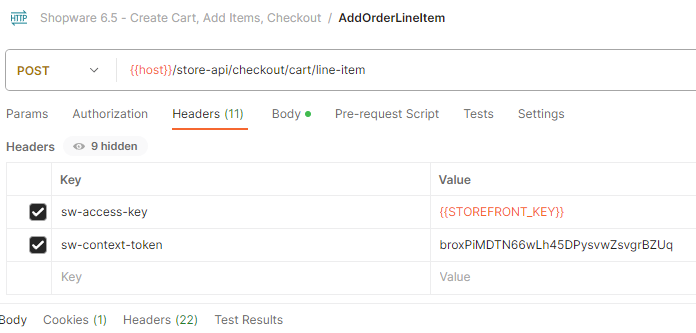
Add a product to the cart
By calling the POST/checkout/cart/line-item endpoint you can add products to your cart. The endpoint takes the following parameters:
- type: identifies the kind of line item we want to add
- referencedId: references the product id
- id: identifies the line item that we are creating (just also use the product id - this makes your - implementation easier)
- quantity: if omitted one item will be added, if specified it will add (accumulate) the specified number to the according line-item.
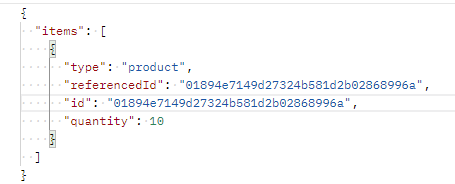
Certainly, you have noticed that items is an array, meaning that you can add more than one product to a cart in one call.
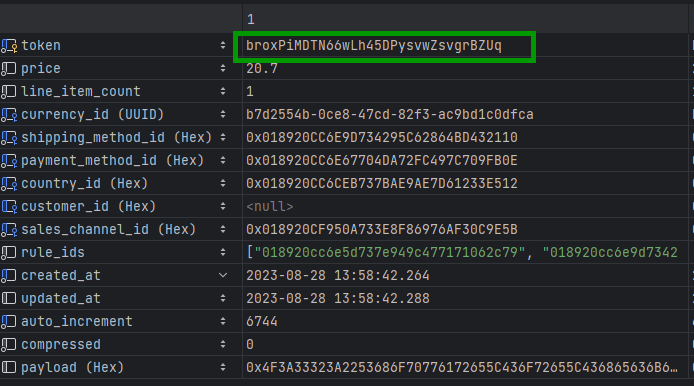
Check on your cart in the frontend and the database
After you have executed this call you might wonder how you can check if you really have a product and a quantity of 10 in your cart. There are different options:
The first option, you got a 200 response from the API which returned your cart with the line items.
The next option is to take a look directly into the database, into the cart table:
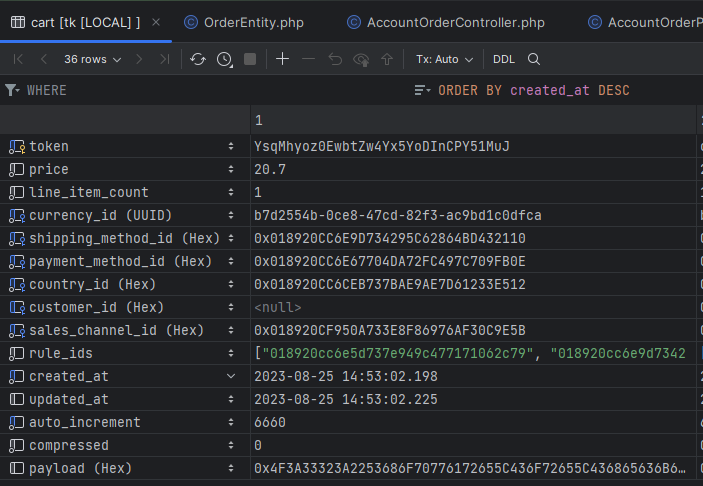
In the screenshot, we see our cart with a line_item_count of 1 because we have 1 product with a quantity of 10 in our cart.
Another option is to simply login to the frontend with your user, and check the cart:
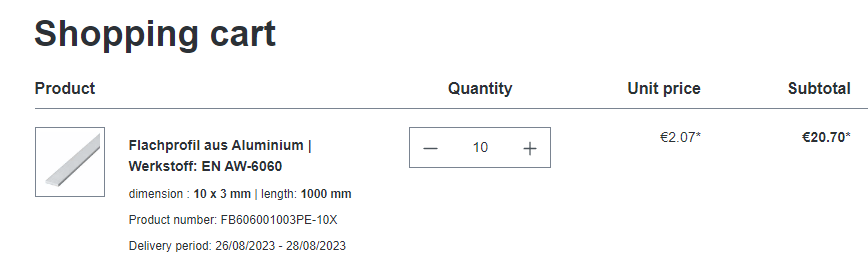
When you add products to your cart or increase the quantity you are working on the same cart object that is referenced by your Postman call because of the sw-context-token. Therefore you can add products to your cart or increase the quantity in the frontend. When you then do another POST/checkout/cart call, you will receive an updated version of your cart.
Increase the quantity of the product
Let’s say you want to increase the quantity of a product that is already in your cart. You can use the POST/checkout/cart/line-item endpoint for that. The only important thing is: “Use the same id (identifying the line item) when increasing the quantity of your product”. Otherwise you will add the same product to your cart but in a second line item.
So you would end up with something like this - which is probably not what you wanted:
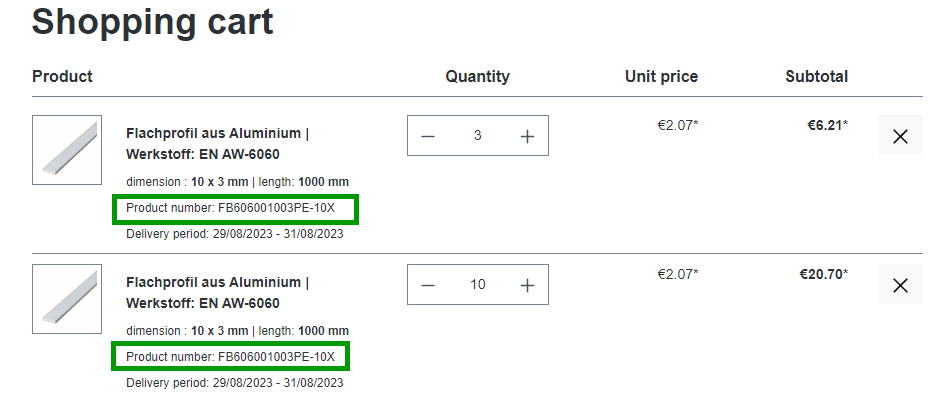
Now that we have two line items for the same product, let’s delete one of the line items.
Delete a line item from the cart
For deleting a line item from the cart, you can use the DELETE/checkout/cart/line-item endpoint.

As request body, you pass an array of ids you want to be deleted from the cart. In our case, we only want to delete one line item.
Hint: You get the ids of your line items by fetching the cart with the POST/checkout/cart endpoint.
Decrease the quantity of the product
If you do not want to delete the whole line item but just decrease the quantity, you can use the PATCH/checkout/cart/line-item.

Remember: The id refers to the line item id while the referenceId refers to the product id.
Checkout the cart - create an order
The final step in this workflow is to create an order from the cart. This is done by calling the POST/checkout/order endpoint.

If you like, you can pass a customer comment. Usually, this would contain some more information about how delivery should be done or any comment a customer would like to attach to the order.
In the Shopware backend, you will see these comments:

Delete the cart
If a customer does not complete the checkout process, you may want to delete the shopping cart after a while. In reality, you want to try to push your sales and send an abandoned cart email to your customer. But for this tutorial, we are satisfied with deleting the cart.
Use the DELETE/checkout/cart endpoint.
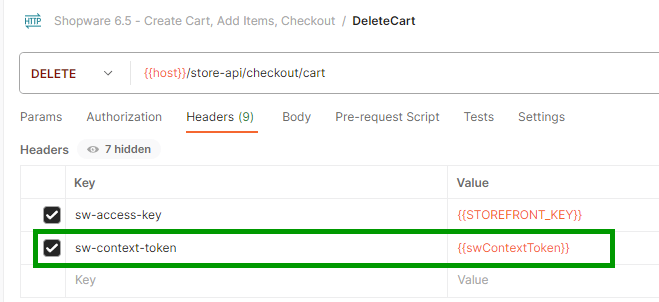
The cart is identified by the sw-context-token, which you received during login.
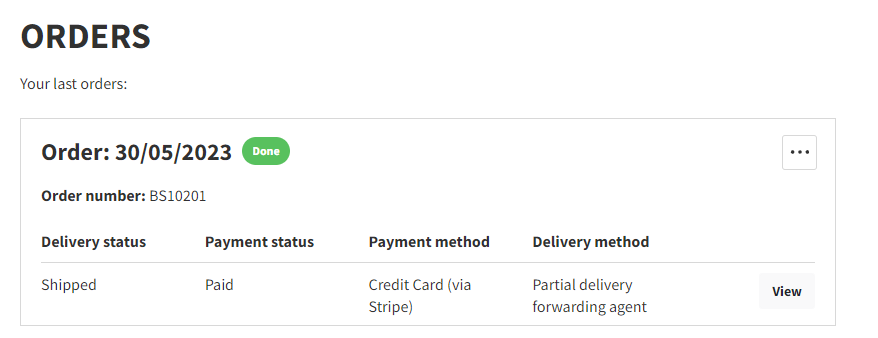
Order Overview
When your customers come back - and we hope they do! - they probably want to see an order history of their previous and current orders including the following states:
- order state
- payment state
- delivery state
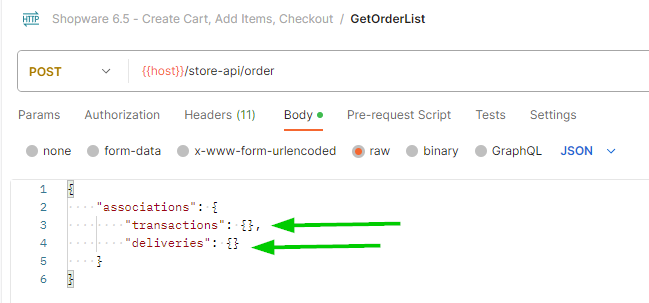
You can use the POST/order endpoint to retrieve a list of all orders for the account you are logged in with.
To also get the delivery and payment state, you need to pass the following associations in the body:
Having a cart and not logged in?
- The following scenario is going to happen very often. It is a bit more complex but worth investigating - because it reflects your customer’s behavior.
- Imagine the following:
- A customer already has an account and has made some orders in the past.
- He visits your shop, logs in to the account, and adds products to the cart.
- He gets distracted because of things happening (cat needs food, dog needs a walk, children need - help, …).
- After returning to his computer, he is logged out of his account but continues adding products to his - cart.
- We now have two carts. One cart with products for his account. One cart with products for a “guest - context”.
- When the customer logs in again to the shop, we want of course all the products he wants to buy in the cart. This means we need to merge both carts into one cart, after the login.
Luckily Shopware brings some nice standard functionality to enable this behavior.
What we need to do is the following:
- When we are not logged in, get the current context and remember the returned sw-context-token.
- Allow the customer to create a cart and add products using the returned sw-context-token (we learned about that in the previous sections).
- Now login and use the sw-context-token for that login. Normally we do not pass a sw-context-token for login, because Shopware returns us a sw-context-token when we login. But in this case, we need to pass the current sw-context-token, to Shopware can do its magic and merge both carts (the account cart and the “guest contest” cart).
- Continue to checkout with the returned sw-context-token from the login (or add products, do line item manipulation, …)
@1) We can get a context by calling the GET/context endpoint and use the returned token as our sw-context-token:

@2) Create a cart and products to that cart:
We can check the database (the cart table) to see for ourselves, what we have created with our sw-context-token:
@3) Login and use our sw-context-token for that login:
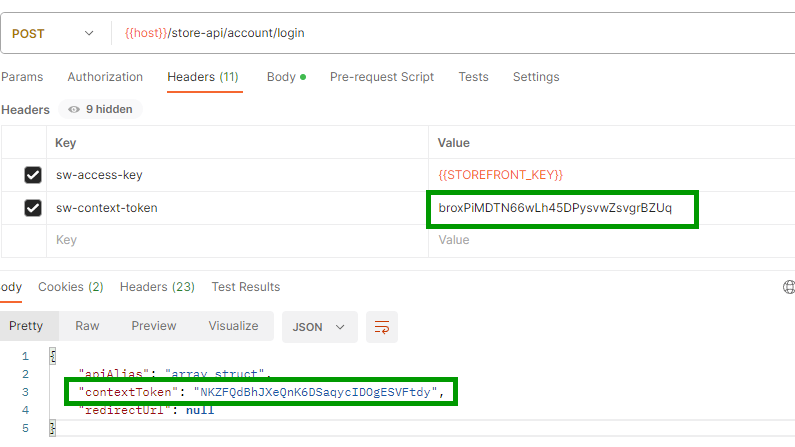
In the screenshot, we see the sw-context-token which we pass for login, and another sw-context-token that is returned in the response body. During the login our cart got reassigned to the account’s context. If there were already products in the cart, they got merged into one cart. For us, this was the case, and we can see that the price has increased because we have more products in the cart:

That is great! Our customer did not lose his products, they were simply merged into one cart.
We hope you found this blog post useful. If you have any comments or questions feel free to reach out to us, we are happy to provide you an answer.
