

Shopware 6 - Postman Collection for Customer Registration
In the previous blog article, we looked at how you can use Swagger to explore the Shopware Store API and then successfully register new customers and log them into their new accounts.
In this article, we will cover how to use Postman to achieve the same goal. In addition to
- registering a customer
- login a customer
we will also learn how to
- logout a customer
- change a password
- reset a password
A Postman collection containing all of the requests that we will be using in this tutorial can be found >>here<<.

- Postman - you probably know everything about it
- Postman - Environments
- Postman - Variables
- Get your Postman Collection up and running
- Register a Customer Account
- Login and Logout from the Customer Account
- Change and Reset the Password
Postman - you probably know everything about it
Postman is a popular collaboration platform and toolset for working with APIs (Application Programming Interfaces) and testing RESTful web services. It provides developers with a user-friendly interface to construct, send, and receive HTTP requests and analyze their responses.
As a developer, you have probably already worked with Postman or a similar tool. If Postman is completely new to you, take a look at the official documentation or read a tutorial, there are a lot of great tutorials out there.
For this tutorial, we need to know about Postman environments and Postman variables because they will make your life a lot easier when working against the Shopware Storefront API or the Shopware Admin API.
Postman - Environments
In Postman, environments are a feature that allows you to manage variables and their values for different execution contexts.
Environments in Postman are useful when you need to work with different sets of variables or configurations based on specific conditions or environments such as development, staging, or production. Rather than hard-coding values directly into your requests, you can store them as variables in environments.
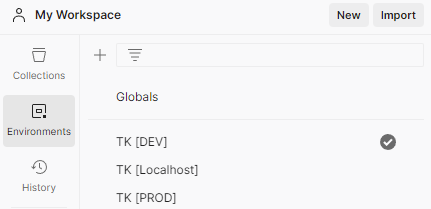
In our case, we could have three different environments, which we use when working against localhost, the development environment, and production.
When you are interested to learn more about Postman environments read their documentation about managing environments.
Postman - Variables
In Postman, variables are placeholders that can hold values and be used throughout our requests. They provide a way to store and reuse data, making API testing and development workflows more flexible and efficient.
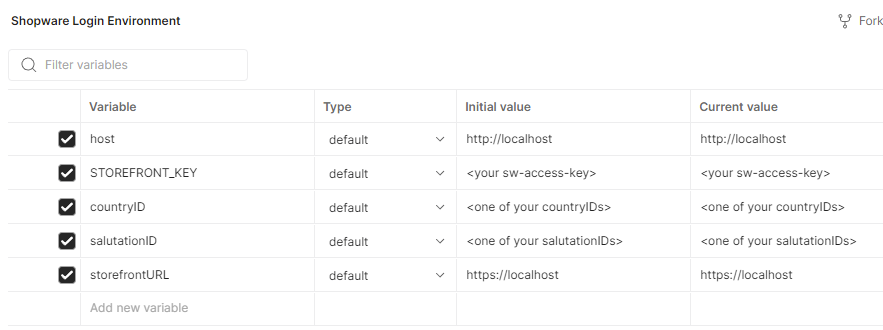
In our case, we use them to store variables like sw-access-key, the storefrontURL, and others.
When you are interested to learn more about Postman variables read their documentation about using variables.
Get your Postman Collection up and running
You can run our collection by clicking the “Run in Postman” button. You can either run it directly in the browser or in the Postman application. In both cases, you need a Postman account, which is free.

Set your variables
I am usually using the Postman application, so I will explain how to work from the locally insalled Postman application. Go to your environments and enter the values for your Shopware instance.
Host and StorefrontURL
If you are working against a Shopware instance you are running on localhost, the “host” and “storefrontURL” variables are already set and you probably do not need to change them.
STOREFRONT_KEY
This variable holds the sw-access-key to the Shopware sales channel you want to connect. You will find the sw-access-key in “Sales Channels -> API access”.
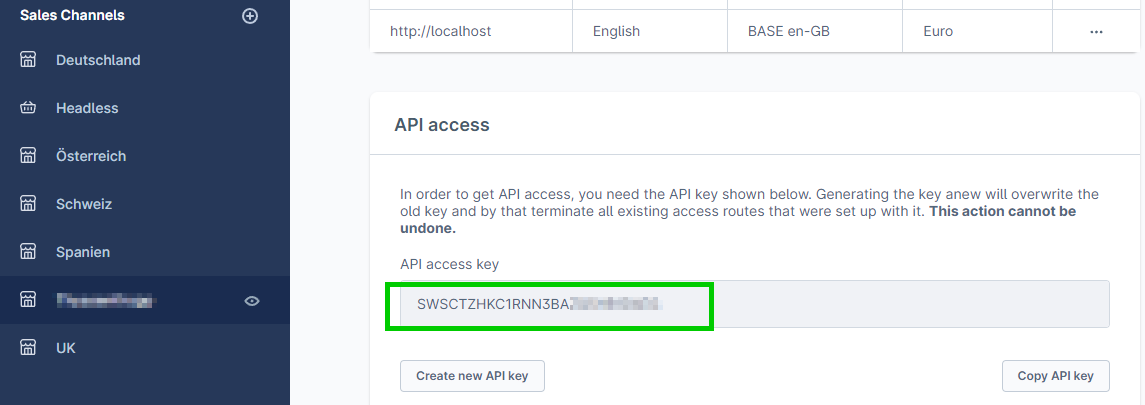
Copy that value to your environment variable.
Note: Think of the sw-access-key not as a credential, but rather as a key that identifies the sales channel you want to use.
countryID and salutationID
These IDs are used for executing the POST/account/register endpoint.
You can find these IDs for your specific environment by calling the following endpoints, in the Postman collection:
- GetAllCountries - GET/country
- GetAllSalutations - GET/salutation

These calls are already working on your system because you configured host and STOREFRONT_KEY in the step before. And they are the only variables used in these calls.
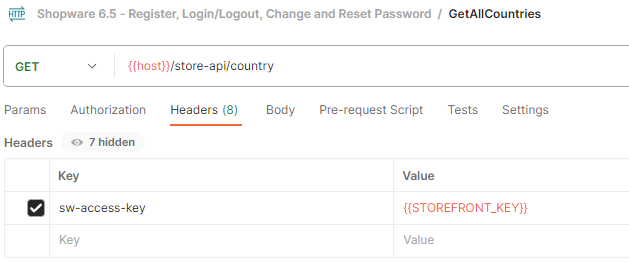
From the response, you copy the id you want to use. In my case, this is the ID for “Mr.”.

Retrieve the id for the country you would like to use in the same way.
Alright, we are set up. Let’s register a customer account!
Register a Customer Account
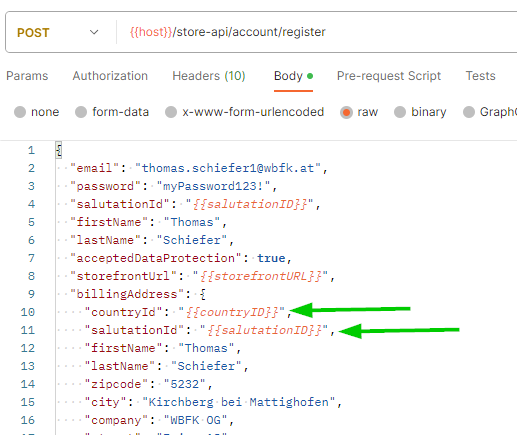
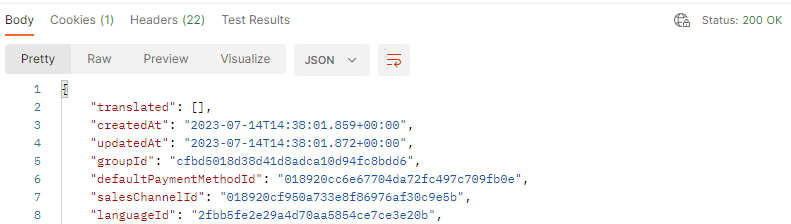
Finally, we can implement the real purpose of this exercise. We can call the POST/account/register endpoint.
Modify the body to your needs. Set the email, password, name, address, and birthdate. Then execute the request. You will receive a 200 OK response similar to that one:
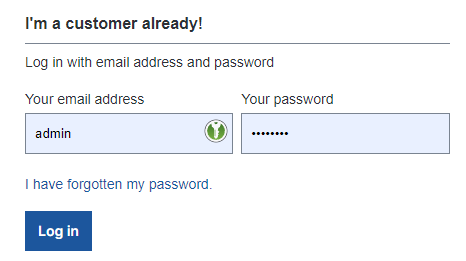
Your account has been created, if you want to make sure it really exists, just log in to your Shopware account with the credentials you have set.
Of course, we can also check if the login is working by doing a login through the login endpoint.
Login and Logout from the Customer Account
Now, that we have created our account we are able to use the following endpoints:
- LoginToAccount - POST/account/login
- LogoutFromAccount - POST/account/logout
Note on logout: When we take a closer look at the LogoutRoute in the code we can see, that any cart for the user is deleted in the case “shouldDelete($context)” returns true.

In the administration, you can switch the responsible flag in “Settings -> Log-in & sign-up -> Clear and delete cart on log-out”.
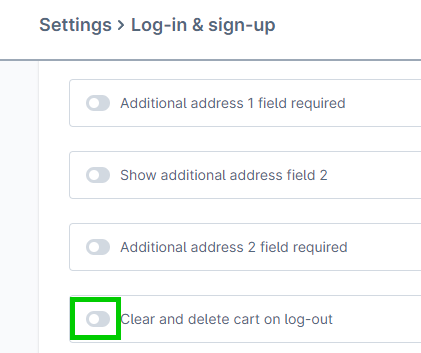
You can also force double opt-in for the registration workflow on this settings page.
Confirm registration in case of double opt-in activated
In case double opt-in for registration is active, we need to call the POST/account/register-confirm endpoint before we can do a login.
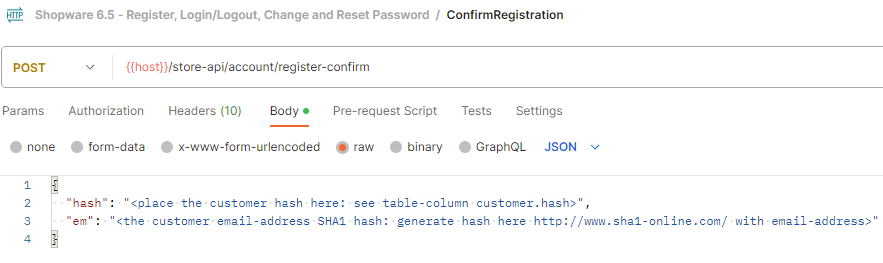
For more details on where “hash” and “em” come from, see the previous blog article in this section.
Change and Reset the Password
There are two cases where the customer is changing the password.
- The customer changes the password. The current password is still known.
- The customer has forgotten the password and cannot log in.
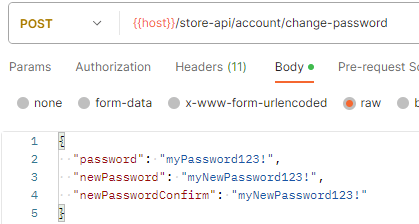
In case the customer knows his current password but wants to change his password, we use the POST/account/change-password endpoint.
The request body has three parameters, which are pretty self-explanatory.
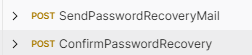
If the customer is unable to log in due to a forgotten password, we require a two-step process that includes the customer’s email address to verify that the person resetting the password is the actual owner of the account.
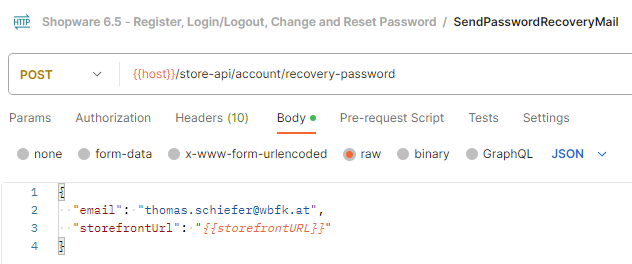
- SendPasswordRecoveryMail - POST/account/recovery-password
- ConfirmPasswordRecovery - POST/account/recovery-password-confirm
SendPasswordRecoveryMail does NOT require to be logged in (because the password is forgotten the user cannot log in). The request takes an email address, and the password recovery mail is sent to that mail address.
If you are working on localhost you can check the sent mails in mailcatcherlocalhost/mailcatcher.

When you are working on a development or testing environment you most probably have attached a mail catching service. We use Mailtrap for that purpose.
The sent password recovery per default looks like that:
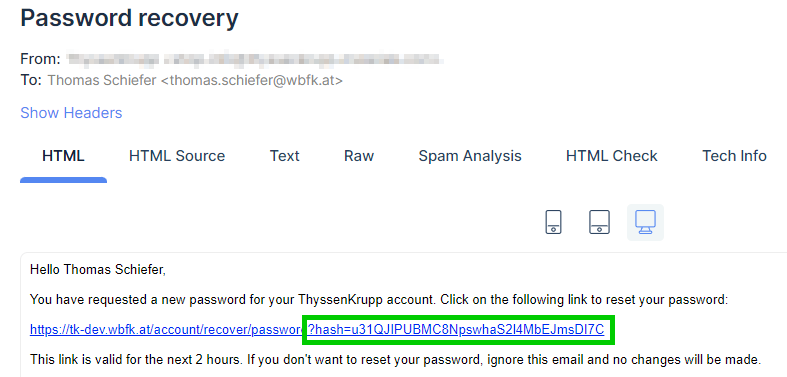
It contains the hash value which is needed for the second step: ConfirmPasswordRecovery.

By using the hash value from the email we verify it is us, who need to reset the password. The other parameters contain the new password.
After having worked through this tutorial you now know how to create a customer account, log in and log out (also with double opt-in activated) and change the password in case it is still known or forgotten.
If you have any questions, feel free to reach out to us, or leave a comment below.
